Shown is the driver side, but the passenger side installation is similar.
Photo 1 - If equipped with manual windows, remove the handle by releasing the c-clip behind the handle that holds it on the shaft. The window should be in the "UP" position for th entire installation.
If you don't have the tool to remove the clip, use an old Tshirt or shop rag and work the edge of the rag down onto the open end of the clip. (You should be able to peek behind the handle and see the clip ends by pushing the panel inward.) Work the rag back and forth and the clip will usually release. The tool is available at many auto parts stores if you can't get the rag trick to work.
Keep your hand or a rag around the handle base while trying to remove the clip. The clips tend to spring off and can go flying if not captured.
Pull the handle straight off the shaft. Once off, it is a good idea to put the C-clip back in place on the handle. You can snap it all the way on at this time.

Photo 2 (Electric window models)
If you have electric windows and door locks, you will need to unhook the switches from the backside before pulling the panel away from the door. Once the panel is loose you should be able to reach behind and unhook them. Watch for locking connectors on the wires that need to be released before they will release.
Make sure the window is up for the rest of the installation.
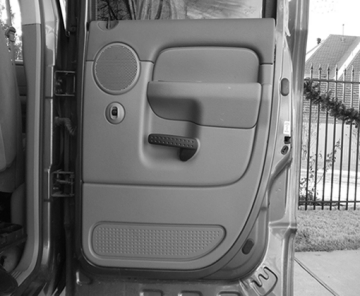
Photo 3
Remove screw behind the inside door handle.
This is a good time to get a little tray or can to hold your screws so they don't get lost.
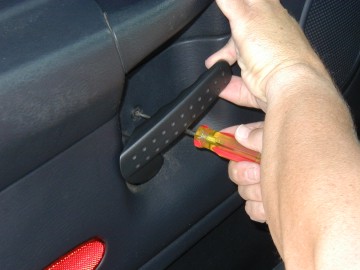
Photo 4
Remove door handle by removing the bolt on the inside end of the handle. The screwdriver in this photo is pointing at the bolt to remove. Use a 10mm socket to remove this bolt.
Note: Some vehicles may use a torx head bolt here. For these, it is a Torx T-40 bit.
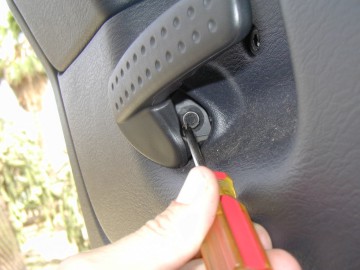
Photo 5
Now the panel should be ready to come off. Lift upward and the panel should come free, then pull out and it should be off the door.
You may have to disconnect the electric window switch or trim light wire if your vehicle is so equipped.
Lay the panel somewhere safe.
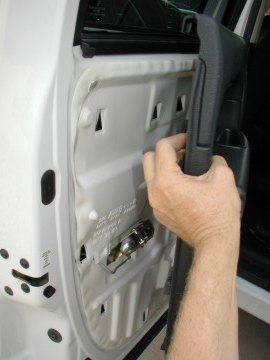
Photo 6
Gently peel the plastic splash guard away from the door. The black adhesive material can be peeled away from the door and re-stuck on the splash guard for reuse.
Peel back far enough so you can get into the door through the access hole shown here at the upper left part of the door.
(This photo is from a front door, but you get the idea, right?)
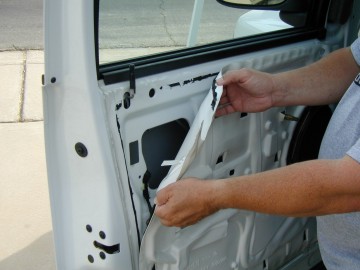
Photo 7
Remove the plastic plug in the door metal to allow access to the handle nut inside the door.
You will need a long extension (about 6 inches) to reach the nut. An 8mm nut driver may be long enough also.
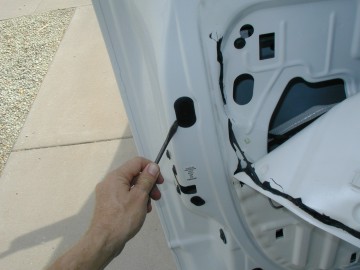
Photo 8
A photo taken through the access hole from previous step. Shown here is the nut to remove. (8mm)
Remove this nut now, be carefull not to drop it into the door. A magnet may be handy to get the nut if you drop it, but better to have a hand under the stud as you remove the nut.
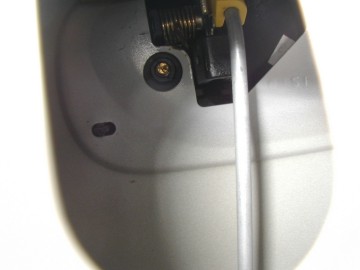
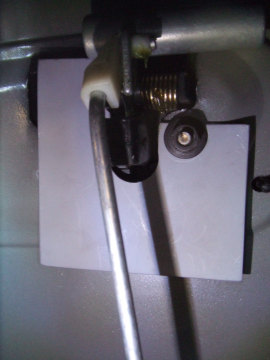
Photo 9
Bring the plate into the door. This photo shows the hole to the left that goes over the handle stud.
The trick here is to get the plate up near the handle, then tilt the bottom edge toward you while reaching around to the outside handle and pulling it out a little. This opens up some room along the top of the handle so the little slot shown near the upper center of the plate here can hook over the handle post.
See the next photo down.
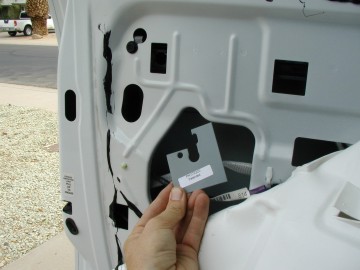
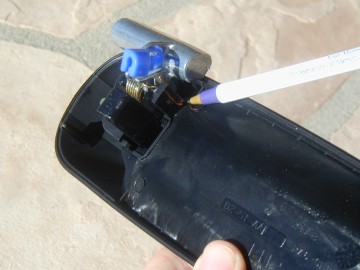
Photo 10
The handle is shown off the truck for clarity. You do not need to remove the handle!
This is a driver side handle, the mounting stud is hidden behind the handle pull mechanism. The pen is pointing to the post that the plate should hook over.
By tilting the plate so the bottom edge is slightly away from the door metal, and pulling on the handle from the outside, more room is available to slide the plate in over the post.
Then drop the plate over the mounting stud and put the handle nut back on.
Test the handle operation to make sure nothing catches. If there is interference, make sure the plate is hooked over the handle post where the pen is pointing here. The plate should be pulled down as far as possible on the stud.
Photos 11 and 12
The back door plates are interchangable, so either plate will fit on either door.
The top photo shows the plate in a drivers side rear door. The bottom photo shows the passenger side rear door wit the plate successfully installed.
The whole trick to this installation is hooking the top center slot on the plate over the post on the handle. Very Important!
This completes the installation. You can put the door back together and start the other side.
Have any other questions? Call our toll free tech support line at 1-480-452-6894.