OUCH!
This photo was sent to us from Dave G. in San Antonio, Texas. This shows why our product is needed on the Super Duty trucks and Excursion SUVs. Dave lost his golf clubs while standing in line in a sub shop for lunch. His truck was right outside and he only had his back turned for a few minutes.
Dave found us on the internet and installed the product himself, too late for his golf clubs, but ready if someone else tries the same thing.
Read through the following tutorial to see how to install the Jimmi' Jammer. Don't wait till it's too late!
Note: We now recommend removing the lock cylinder from the handle completely. This is the only way to prevent thieves from forcing something into the lock body and bending all the tabs inside the lock to gain entry. Using the PunchPlug™ with the Jimmi' Jammer® will help prevent the most popular methods of entry on your truck! Details
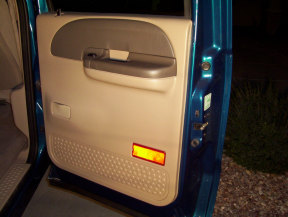
Front Door Installation
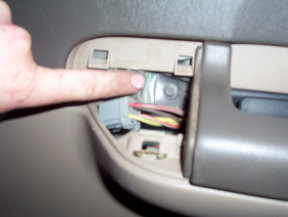
Photo 1
The first photo shows the inner door panel. First, remove the electric lock and window switch module from the door panel by carefully prying in an upward motion. The module is shown here just after it came out of its' mounting position.
Notice that the window is in the up position.
Two screws hold the panel to the door and the panel will lift off. Read on...
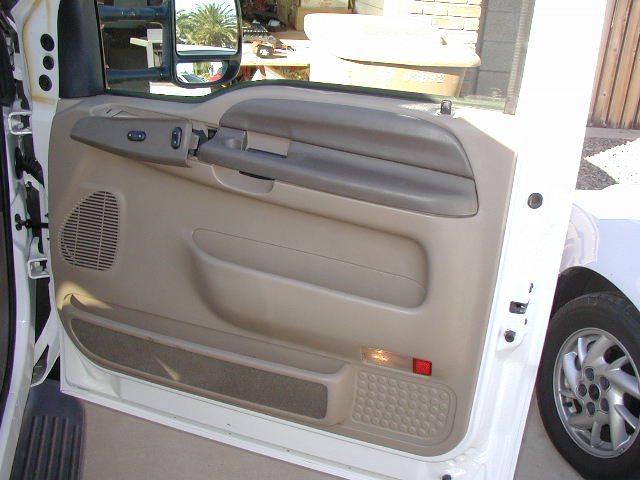
Photo 2
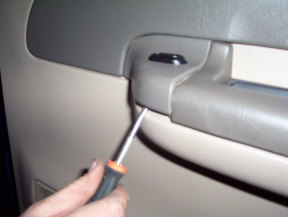
Remove the upper trim piece by prying it away from the door metal. The posts are all plastic so work carefully. Pull the trim straight off the door.
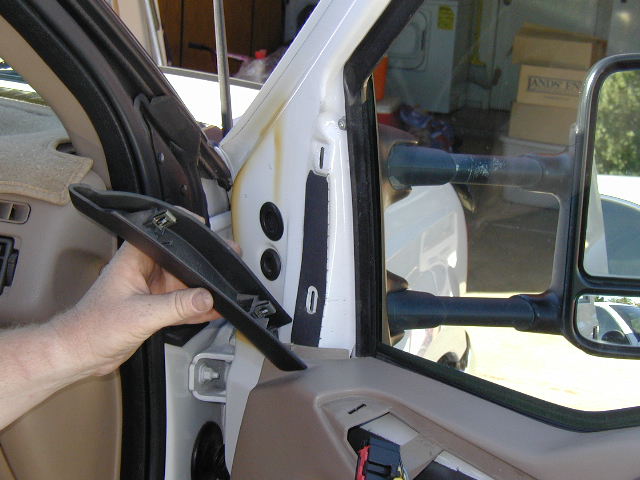
Photo 3
Pull the switch module out of the cavity only far enough to allow you to get a grip on the connectors. Use care to not stress any of the wires.
Most connectors lock into the connected position. Look for the release tab before pulling too hard on the connector. Do not pull on the wires, grab the connector only by the housing. See Photo 4 below.
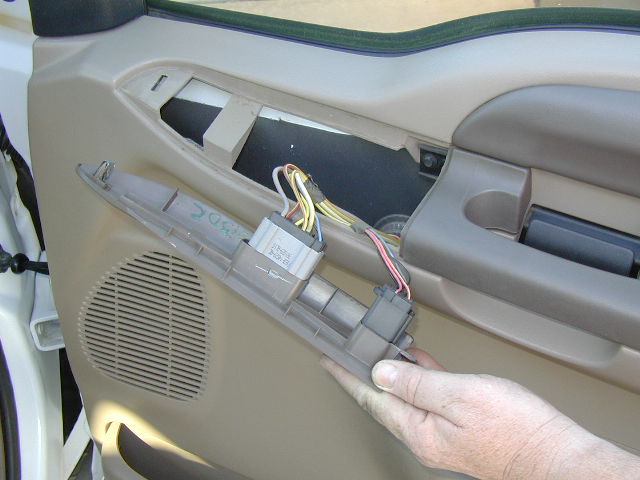
Photo 4
Disconnecting the window switch and door lock switch from the switch module. Note the locking tabs on each connector.
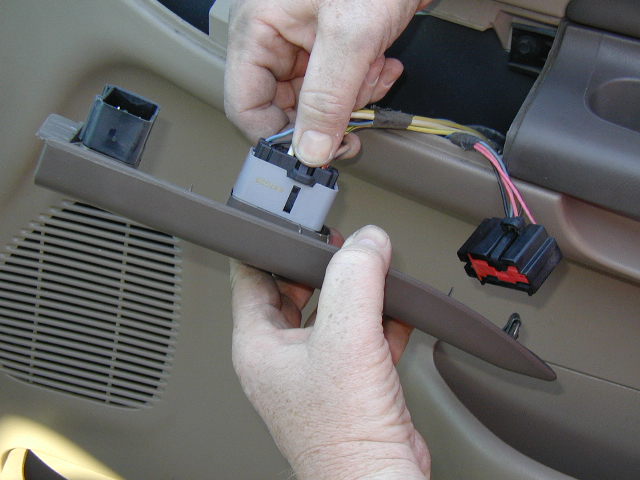
Photo 5
With switch module removed, you can now remove the first panel bolt, shown here in the center of the picture in the switch module cavity.
Remove this bolt now.
Be careful not to lose the bolts.
Note: 2008 and newer trucks may be different, see below.
2008 and newer Super Duty door panel
On 08 and newer trucks, there should be 2 screws along the bottom edge, remove those.
There is also a small door under the arm rest. Gently pry this door out of it's spot, and you should find two more screws there. Remove these also.
Some trucks may not have the courtesy lamp in the next step. In that case, skip steps 6 & 7.
Photo 6
The courtesy lamp lens on the outside, lower corner of the door panel snaps into place in the panel recess. Use a small flat blade screwdriver to gently pry one end out first. There is a small slot on the lens for this purpose. Work carefully, the lens should come out easily.
The second panel fastening bolt is also in the lamp recess area. Remove this bolt now.
With the two bolts removed, you should be able to lift the panel straight up and then away from the door metal. Don't pull away too far, you must remove the courtesy lamp from its' holder. See Photo 7 below.
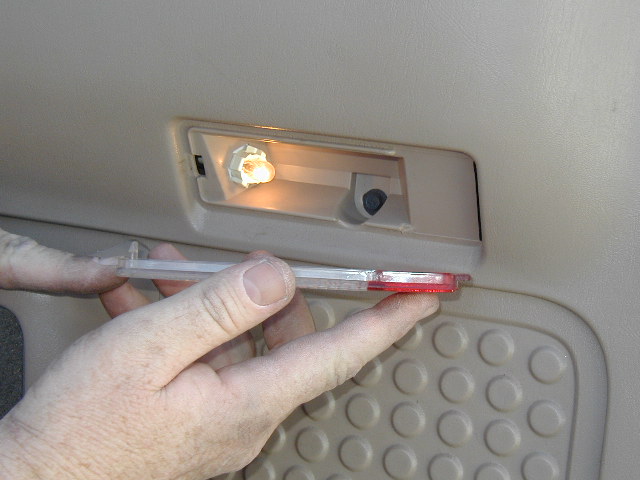
Photo 7
Carefully disconnect the courtesy lamp before moving the door panel away from the door. Twist the bulb holder and then pull the assembly out of the holder. The bulb will remain on for some time, then will usually go off by itself. (It is on a timer circuit.)
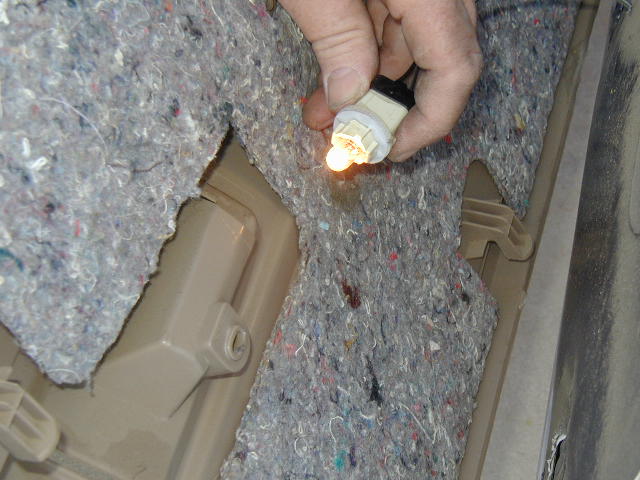
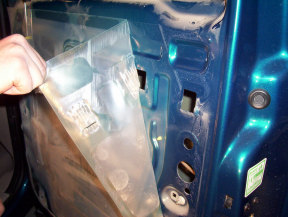
Photo 8
Next, gently peel back the splash guard starting at the top corner near the door lock knob.
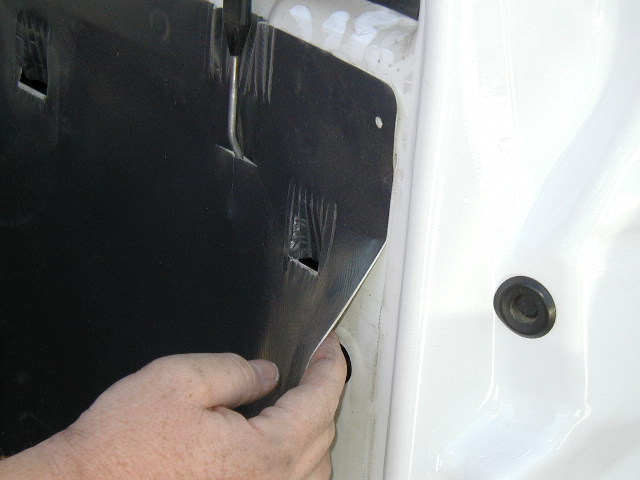
Photo 9
Peel back the splash guard far enough to get your arm into the cutout area shown here near the center of the picture. You do not need to remove the splash guard completely. Peel gently to preserve the adhesive on the splash guard.
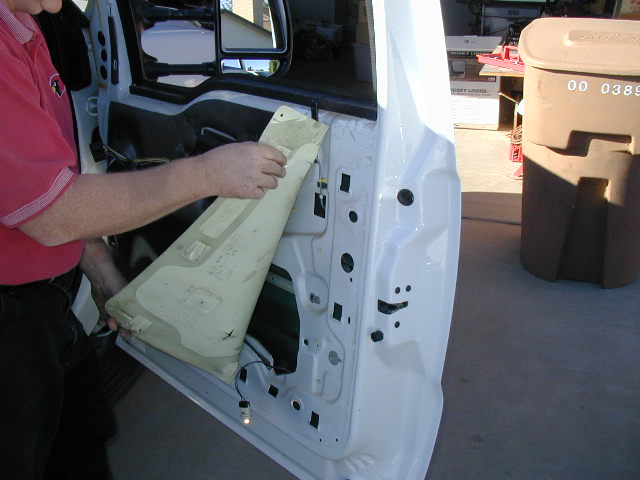
Photo 10
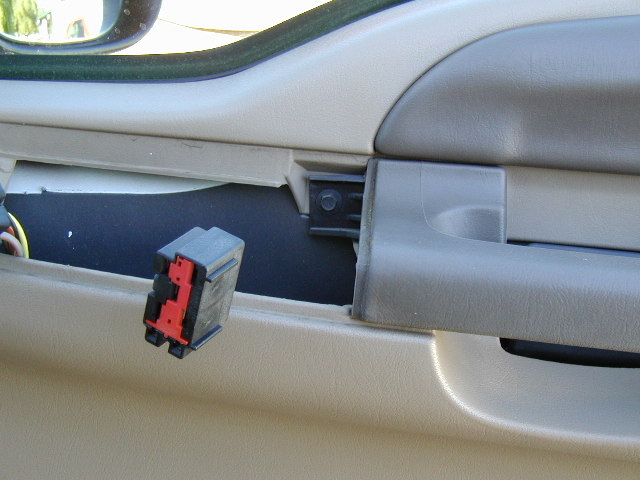
Remove the rubber plug in the door jamb. This will give access to the upper door handle mounting nut inside the door.
Loosen the upper nut, but don't remove it. Two or three turns loose is enough to allow a little handle movement while you put the plate on the other stud.
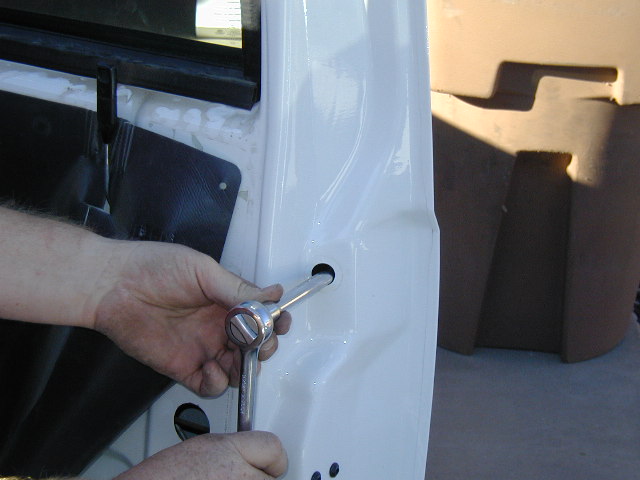
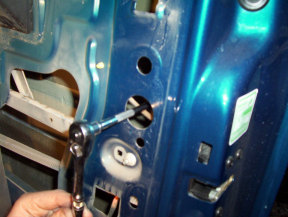
Photo 11
Disconnect the rod from the lock pawl. A good trick is to use the round shaft of a screwdriver to open the lock clips on the pawl, allowing the rod to slip out easily. If you just pull the rod, the lock clips on the pawl will break.
The trick is to push the shaft of the screwdriver in until it touches the rod in the pawl, then pull both out at the same time.
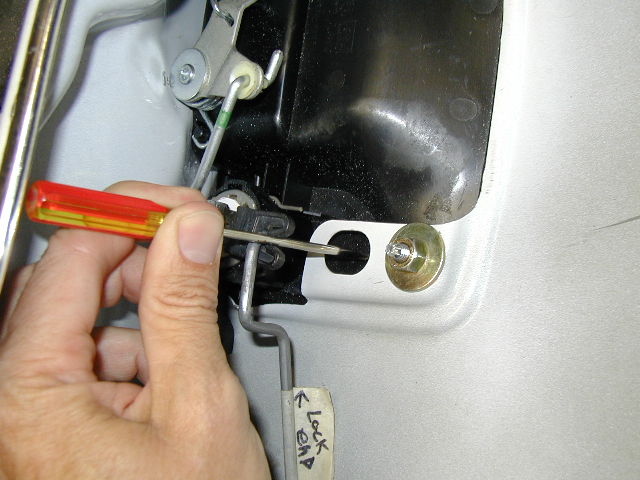
Photo 12
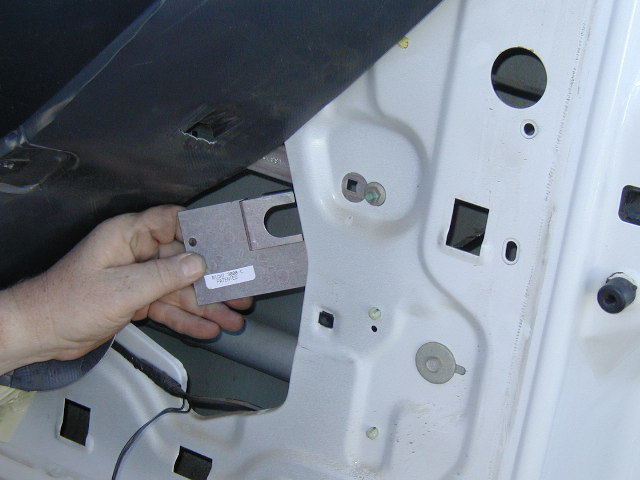
Remove the lower door handle nut completely from the stud. (Not shown here.) Check that you have the proper plate for the door you are working on, the plates are marked "Driver" or "Pass".
Bring the plate into the door through the open area. The cutout in the plate should surround the lock cylinder on the top and bottom as shown in Photo 12 below. (Note the plate in this photo is an older design. Your plate will look like the one in Photo 12.)
Put the lock pawl through the large hole in the plate, then swing the plate into position and slip it down on the stud.
You may have to push the handle out from the door slightly to allow enough room for the plate to be mounted and/or move the lock pawl up or down using the key in the lock to get the plate over the pawl. Put the plate mounting hole over the lower handle stud and replace and tighten the nut.
Photos 12 and 12a.
NOTE: These photos show the door latch assembly and handle pull rod disconnected for clarity. You shouldn't have to disconnect either to install the plates.
Photo 12 (top) shows the plate in place with the handle mounting nut back on. Don't tighten the nut yet just put it on the stud.
All of our newer Super Duty kits are furnished with correctly sized hose clamps to put around the lock cylinder holder. This reinforces the lock holder to help prevent the plastic from breaking.
Photo 12a (bottom) shows how the clamp fits, with the screw to the bottom. First, slip the clamp around the lock cylinder holder.
Next, push on the plate surface around the lock to get the plate seated against the snap clip that holds the lock in the plastic holder.
Now tighten down the clamp. Do not over-tighten as the plastic lock holder may crack. Snug is good enough.
Last, snug up the handle mounting nut. Do not over-tighten.
Passenger side note: If your truck has a lock cylinder only on the drivers side, you won't need a clamp on the passenger side. The plate on the passenger side will be similar, but without the hole for the lock cylinder. PUT THE PLATE ON EVEN THOUGH THERE IS NO LOCK! Thieves may still be able to get into the door cavity with a screwdriver if you don't have the plate on the passenger door. Trucks that have a lock on the passenger door will have a plate similar to the driver side plate with the hole for the lock.
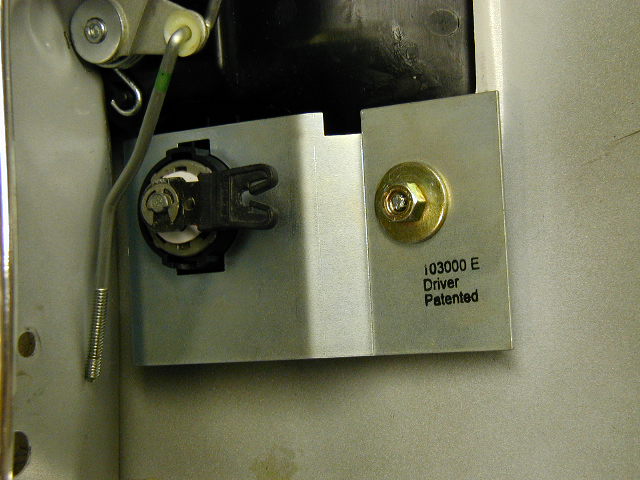 Photo 12
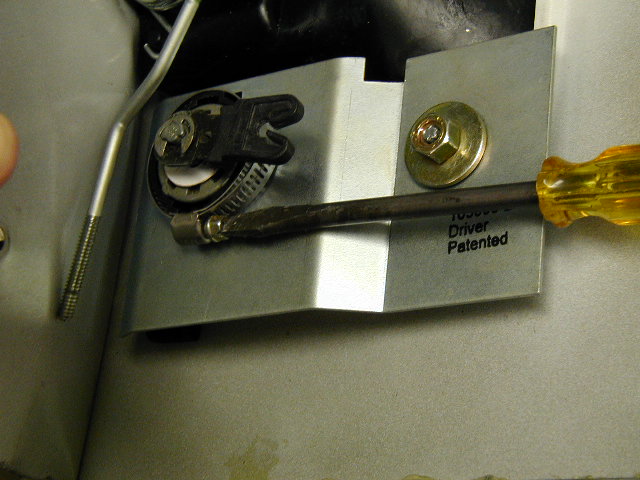 Photo 12a
Note: We now recommend removing the lock cylinder from the handle completely. This is the only way to prevent thieves from forcing something into the lock body and bending all the tabs inside the lock to gain entry. Using the PunchPlug™ with the Jimmi' Jammer® will help prevent the most popular methods of entry on your truck! Details
Photos 13 and 13a
Some later model trucks (2006 and newer) may have this bracket on the handle. (Black with yellow tip in photo 13.) Others may have a molded plastic leg on the handle as shown in photo 13a.
Either bracket style should not interfere with the plate, but if it is in the way, you may be able to add a flat washer onto the stud, behind the plate to gain a little space. In most cases this should not be necessary.
This bracket was apparently added at the factory to help prevent the handle from being easily pulled away from the door where a thief could then move the rods. It is helpful in that respect but does not prevent prying in under the lock or smashing the lock into the door, two very common methods of entry on these trucks.
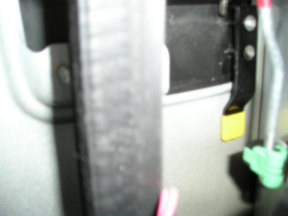 Photo 13
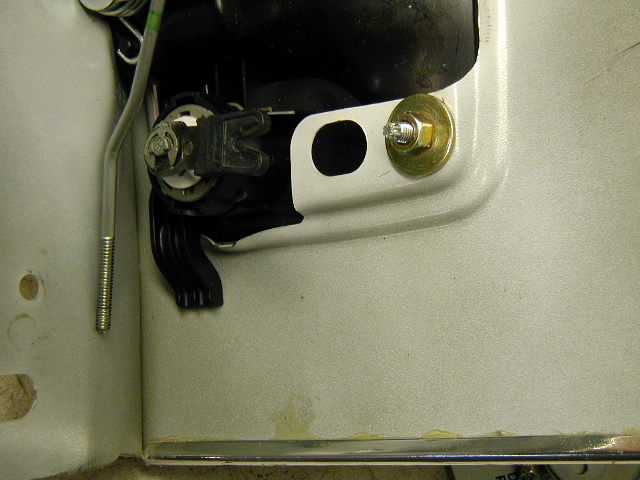 Photo 13a
Finishing up
Now that the first door has the plate in place, test the function of the lock assembly. Once everything is confirmed as ok, you can re-assemble this door in reverse order. The other door will be easy!
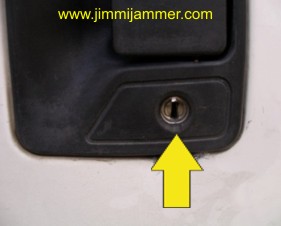
Re-tighten both handle nuts as needed and replace the rubber plug in the door jamb.
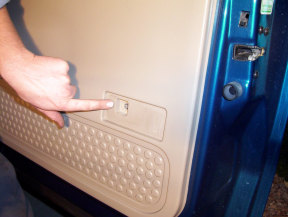
Now you can place the window warning label in the lower corner of the window. Place carefully since the adhesive on the stickers is really good.
This completes the front door installation.
Four door truck owners continue to scroll down this page to see the rear door tutorial..
Do you have comments or suggestions? Feel free to visit our contact page and send us an email. We also have free tech support should this tutorial not answer all your questions.
 |
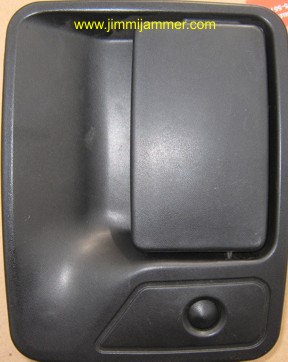
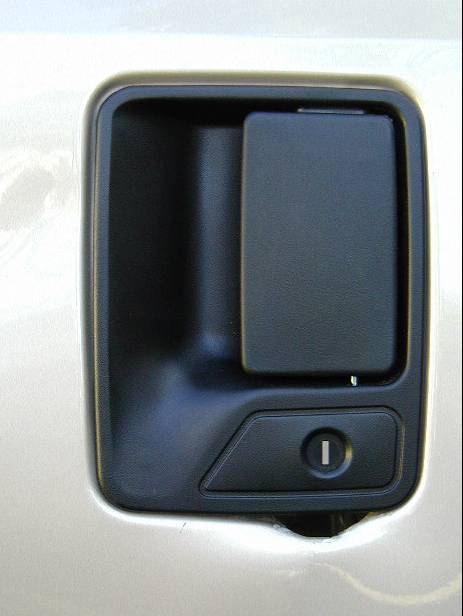
<< Does this look familiar? Here the thief jammed a screwdriver into the lock to gain entry.
|
|---|---|
|
<< As part of your security package, check out our PunchPlug™ or LockCap™ products. PunchPlug™ does away with the lock altogether. LockCap™ just covers the lock to deter the thief from trying. Click on the product above to see details about each. |