Note: We make every effort to ensure the accuracy of our tutorials, but sometimes the vehicle manufacturers have some changes we are not aware of. If you find exceptions or differences please email us info and pictures if possible and we will add the info to the tutorial.
Some pictures may have been added later, so the handle or body color in some photos may vary.
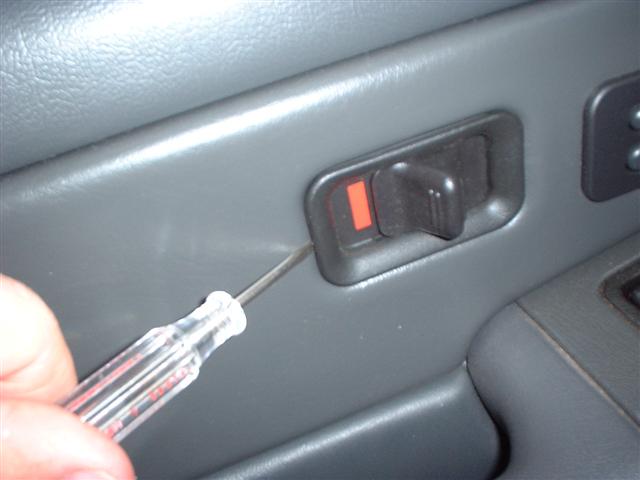
The first photo shows removal of the shroud around the lock slide switch. Gently pry the outer edges and the shroud will snap off.
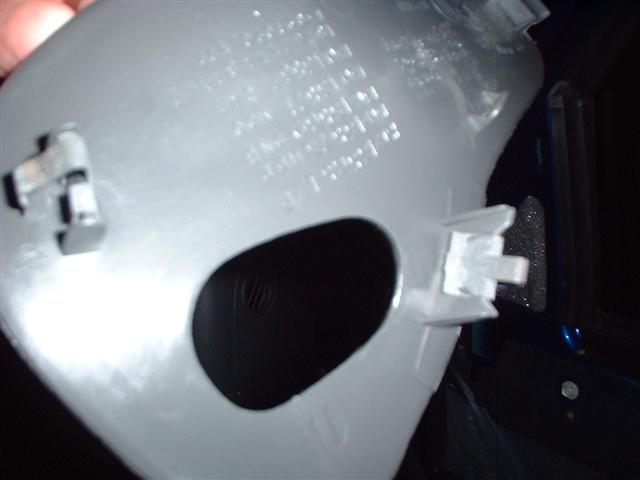
Gently pry the door handle shroud away from the panel. All the snaps are plastic so work carefully. See next photo for snap locations on the shroud.
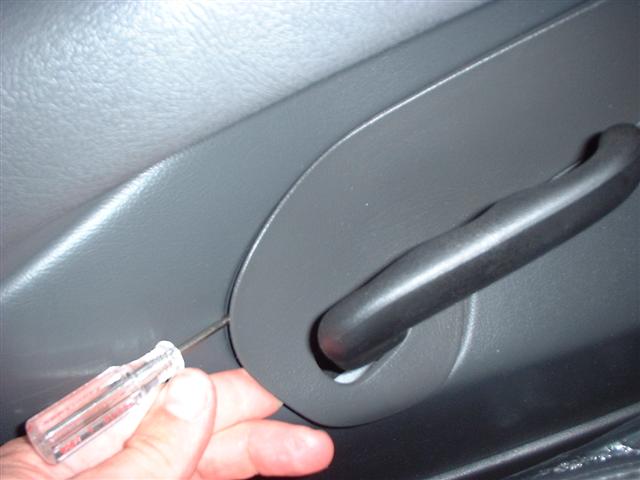
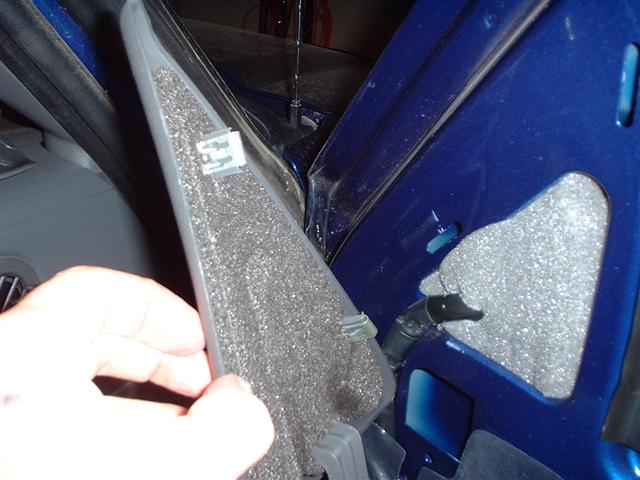
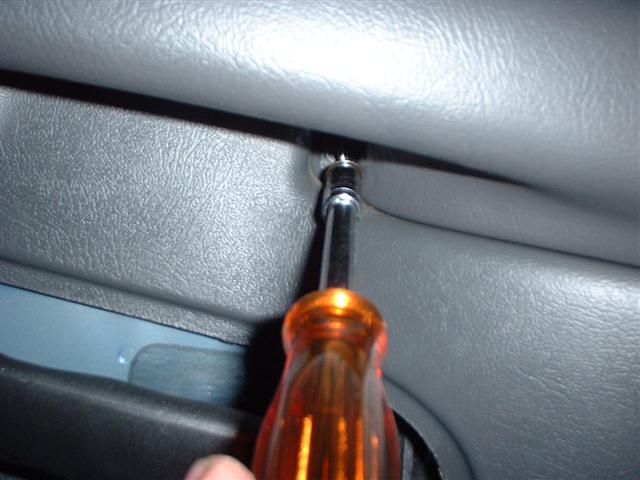
Remove trim panel screw hidden just above the door handle pull. There may in some cases also be a screw hidden behind the handle pull shroud, look around and as you start the panel removal,
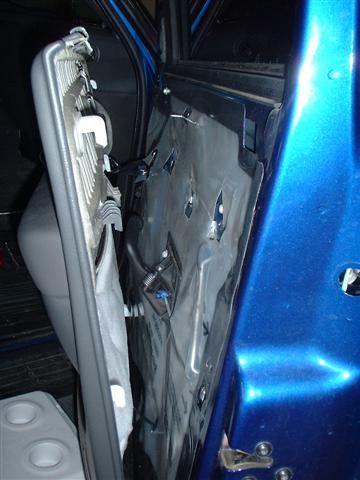
The door panel will lift up and away from the door frame. If it doesn't seem to come away easily, look for additional screws holding the panel in place. Once all screws are removed, the panel should slide up easily and come off the frame. Usually it is easiest to have the window down for panel removal, but you will need to roll it back up
Unhook the window and lock switch connectors and the trim light wire, see next photo.
Be careful with the connectors, most have a little locking tab that needs to be pushed or pulled to allow the connectors to come out of the sockets easily.
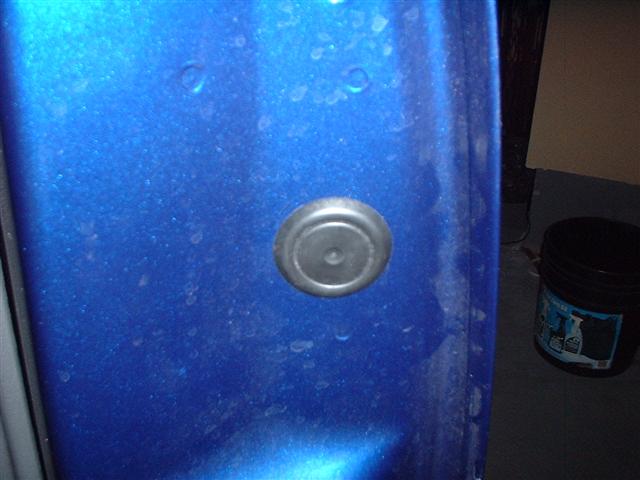
This photo shows the hole in the door jamb with the rubber plug.
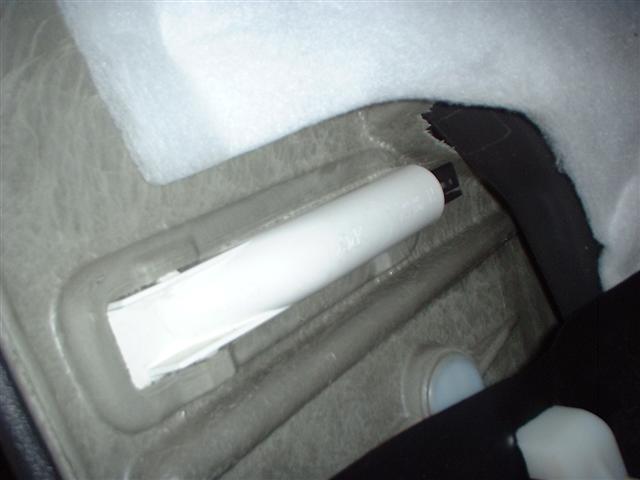
Remove the rubber plug to gain access to the upper handle nut. It is generally not necessary to remove all three handle nuts, but loosening the third may give you more room to work by slightly dislodging the handle from the door.
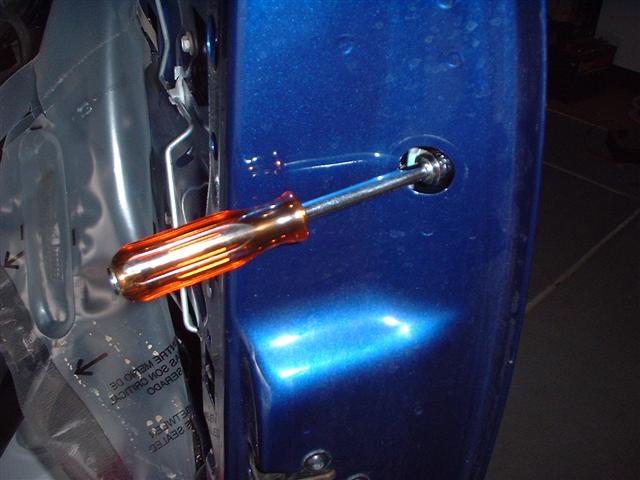
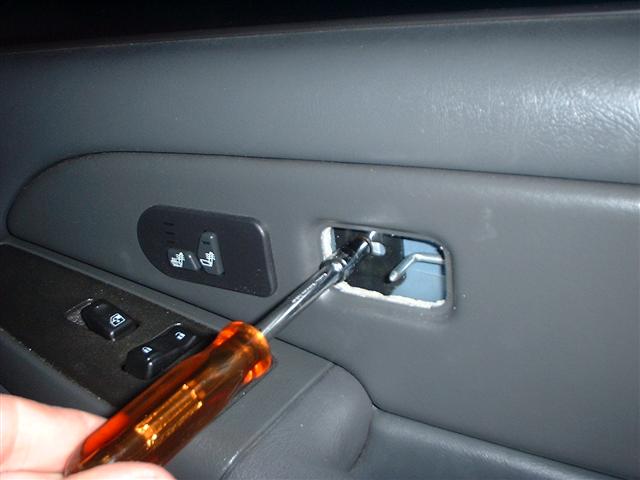
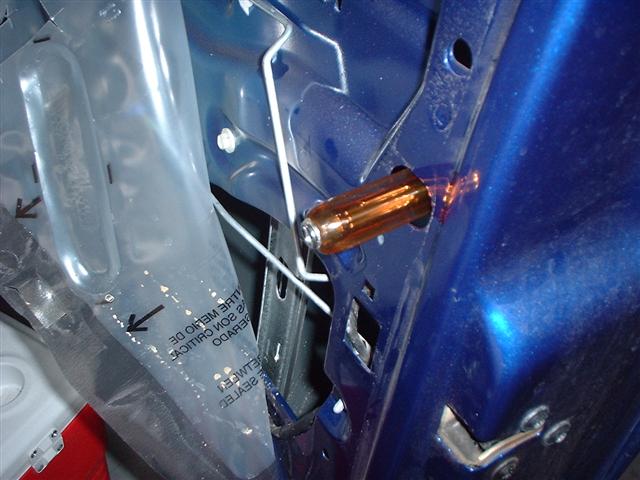
Access to one nut is gained by removing a second rubber plug in the door, shown here where the nut driver is inserted into the hole after the plug was removed.
Handle stud locations can be seen on the next photo below.
To remove the handle:
1. Disconnect the lock rod at the pawl by snapping the lower part of the plastic rod holder off the rod, then pull the rod back out of the pawl.
2. Disconnect the handle pull rod, either at the top or bottom, whichever is easiest for you to reach.
3. There are 3 nuts holding the handle on the door, remove them. (see next photo).
4. Pull the handle out of the door.
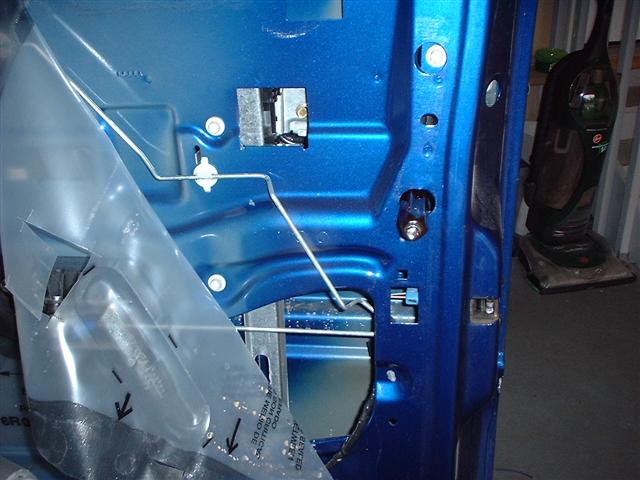
This photo shows the locations of the 3 studs holding the handle in the door. (Upper left, upper right and just to the right of the lock cylinder.
We are now providing the kits for this vehicle with a circular clamp for each lock cylinder. The purpose of the clamp is to reinforce the lock cylinder holder plastic to help prevent punching the lock into the door and to strengthen the entire assembly.
You can also see here the circular clamp has been placed around the lock cylinder. Read the next steps before tightening the clamp.

Note: Refer to the plate you have in your kit, check the marking for a Rev Letter, such as K or M for this step as the clamp placement will differ depending on the plate style.
Using the circular clamp supplied with the kit, adjust the clamp to just larger than the lock cylinder holder. Slip the clamp over the lock holder plastic, covering the snap clip that holds the lock in the plastic. Position the head of the clamp as shown in Photo A if you have plate style Rev K or earlier (H,I,J etc.). It is best to snug the clamp up before putting the handle back in the door.
If you have plate style Rev M or later, (N, O etc.) the clamp should be positioned as shown in photo B. For this placement, leave the clamp slightly loose and allow enough room between the bottom edge of the handle and the clamp head to allow getting the handle back in the door. You may have to move things around as you re-install the handle. Once in the door, tighten up the clamp, keeping the head as shown in photo B.
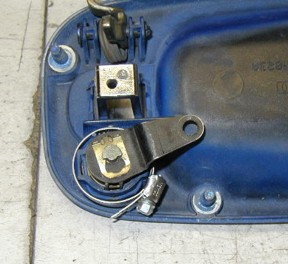 <A Place clamp like this if your JJ plates are marked with letters A - K after the part number.
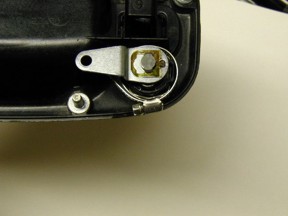 <B Place clamp like this if your JJ plates are marked with letters M, N, O etc. after the part number. On this placement, don't tighten clamp until handle is back in door as you may need to move it to get the handle back in door.
Photo C shows how plates marked with letters M, N, O etc. will look when attached to the handle. Don't attach the plate to the handle yet, this is just to show how they will mount to the handle.
Photo D shows how plates marked with letters J, K, etc. will look when attached to the handle. Don't attach the plate to the handle yet, this is just to show how they will mount to the handle.
Some older plate styles may look a little different, but are still ok to use. Just be sure to use the circular clamp around the lock holder as this adds much strength to the assembly.
Some plates may be marked L (Left) or R (Right).
Drivers door is the left plate.
Passenger door is the right plate.
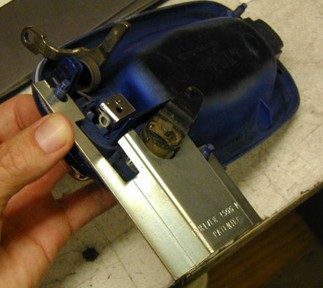 <C
<C
 <D
<D
Now put the handle back on the door from the outside. Don't re-attach the rods yet as they will just be in the way.
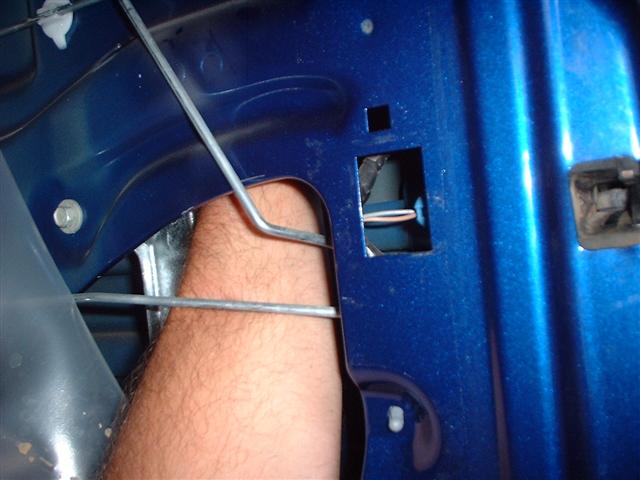
Once the handle is back in the door, bring the plate in through the access hole as shown here. It may help to move the handle in and out a little while you position the plate over the two mounting studs nearest the lock. It may also help to use your key to move the lock pawl up or down to help get the plate in place.
When the plate is in place, and the handle is back in place install the handle mounting nuts and tighten them snug, but do not over tighten.
Re-attach the lock rod and handle pull rod.
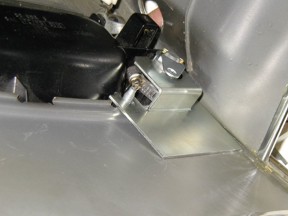
This photo shows the passenger side inside the door, with Rev K plate in place. Other plates, such as Rev M, will look a little different, but the idea is the same.
Once in place, replace all three handle nuts, reattach the lock and handle rods and test the operation of everything before re-assembly of door. Reverse the order of disassembly to put the door back together.
This completes the installation process. You can now do the other door!
Problems? Call tech support at 480-452-6894.