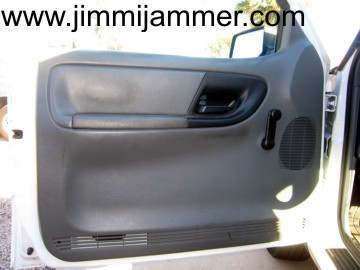
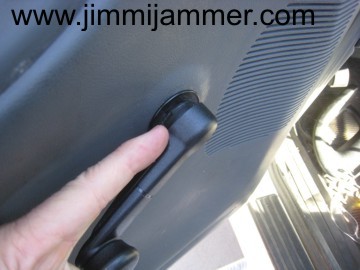
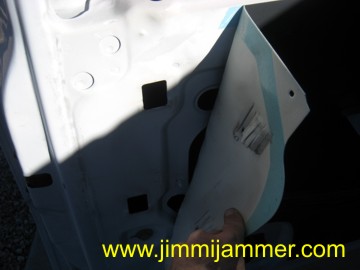
Photo 1
The first photo shows the inside door trim panel, drivers side, on a 2006 Ford Ranger.
This would be a good time to get a little tray to hold your screws and other hardware so you don't lose them.
This tutorial covers typical door panel removal with the manual windows. Power window versions are similar, but the switch module must be pulled away from the panel and disconnected.
 1
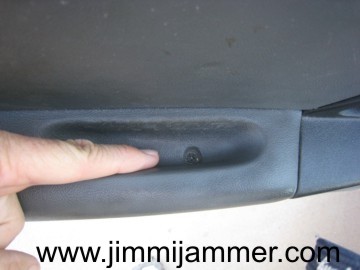
1 Photo 2
This photo is looking down on the arm rest pad. Remove 1 screw from inside armrest.
 2
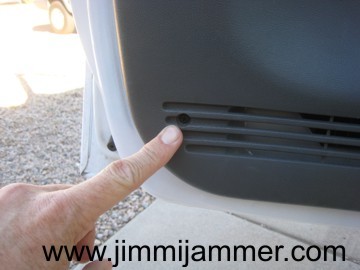
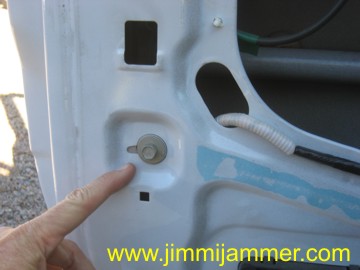
2 Photo 3
Locate and remove 1 screw from the outside lower corner of the door panel.
 3
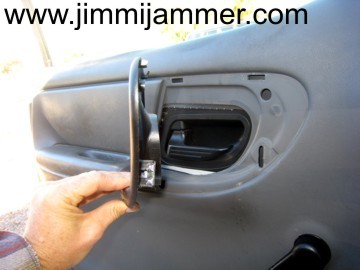
3 Photo 4
Gently pry the inside handle shroud off the door panel. It snaps in place with snap clips along the bottom and sides and 2 plastic tabs at the top.
Work from the bottom edge first, prying the shroud away from the panel.
 4
4 Photo 5
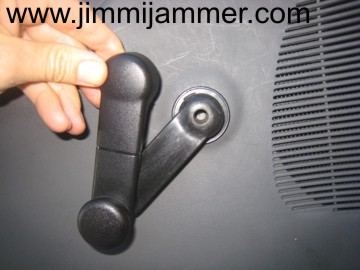
Note: Have window in "up" position before removing the handle or electric switch panel.
To remove the manual window handle, start by using a flat blade screwdriver to pry the cover off the large end of the handle. Just the large end cover will come off the handle. The cover will then swivel at the smaller end.
If you have the electric windows, the control panel should pry up and out of the door panel. Work carefully as some connections will be hot and could short to your tools.
 5
5 Photo 6
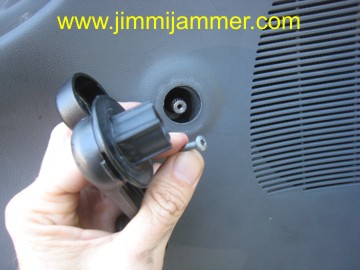
After the handle cover comes loose, swivel to one side to reveal the torx head screw holding the handle in place.
 6
6 Photo 7
Remove the screw using the size 15 Torx bit.
With the screw removed, pull straight out on the handle to remove it from the door.
 7
7 Photo 8
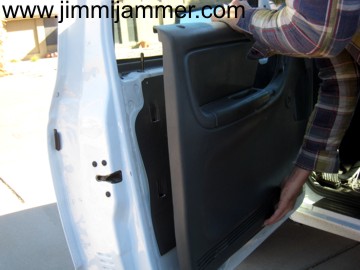
At this point, the door panel should feel somewhat loose on the door.
Lift straight upward on panel. It should move up fairly easily. If not, look for other screws or clips holding panel in door.
Some vehicle model years may have screws or clips in other places than shown here.
 8
8 Photo 9
Start at the upper outside corner of the door and peel back splash guard enough to gain access to inner door components.
 9
9 Photo 10
Removal of the lower window channel on the outside edge of the door will give you much more room to work, and it is easy to do.
First, locate the window channel and feel the top end where the lower and upper window channel meet. This will be just above the low edge of the window, when the window is all the way up.
Notice that the lower channel slips into the upper channel, and is connected by a simple slide clip on the closed end of the channel.
To remove the lower channel, familiarize yourself with how the two channel halves mate, then remove the bolt at the bottom end of the lower channel, shown in photo 10.
 10
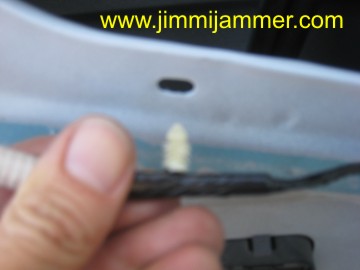
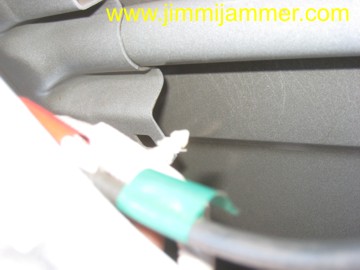
10 Photos 11 & 11a
If your vehicle has a wire bundle clipped to the channel bracket, you will need to disconnect the wires from the channel. They are snap clipped to the channel bracket and door skin with simple push-in clips.
Use a flat screwdriver to pry the snap clips out of the metal holes they are in.
Be careful not to damage the wires.
Photo 11 shows the clip on the door skin, outside the door cavity.
Photo 11a shows the clip inside the door cavity. This is fastened to the window channel holding bracket. This photo shows after it was released from the bracket.
When the wires are released (if present,) and the channel bolt is removed, the window channel should be able to slide straight down and come away from the upper channel.
Tip: When it comes time to put the channel back in, start by sliding the upper end over the window edge. Then, with the channel vertical, gently slide the lower channel upward and be sure the clip snaps back onto the upper channel.
This is easy to do as long as you know how the channels fit together, which you can do by feel.
 11
11
 11a
11a
Photos 12 & 12a
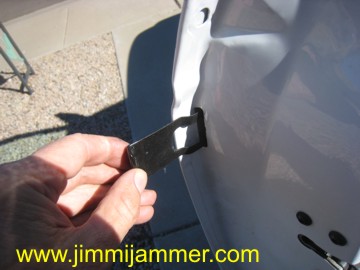
Next, remove the snap clip holding the lock cylinder in the door. The end of the clip is on the outer door jamb, just above the door latch mechanism and near the outer door skin.
Remove the clip by pulling straight out away from door jamb as shown in Photo 12.
Photo 12a shows removal of the lock clip from inside the door.
Note:
Photos 12 - X are taken on the bench for clarity, but you should not remove your lock from the door.
 12
12
 12a
12a
With the snap clip removed, it is easy to move the lock so that the lock rod can be disconnected from the lock pawl. (No photo for this.)
The lock pawl is the white plastic piece in these photos, the lock rod is not shown.
- Pull the lock away from the door from the outside slightly.
- Maneuver the lock so that the rod end can slide out of the lock pawl.
- Put the lock back in place in the door metal.
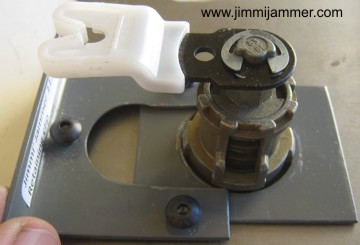
Photos 13 & 13a
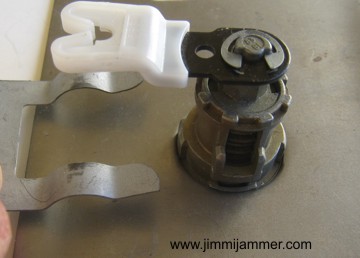
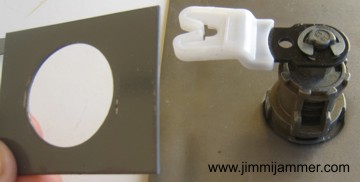
With the lock rod removed, and the lock back in place, slip the Jimmi' Jammer® backing plate over the lock as shown in photos 13 and 13a.
 13
13
 13a
13a
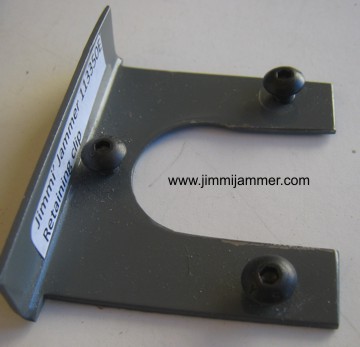
Photo 14
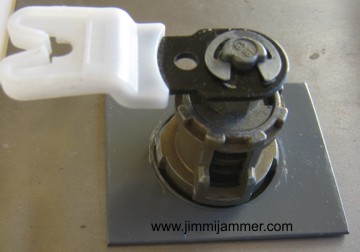
Prep the Jimmi' Jammer® lock clip.
First, apply a drop of thread-lock adhesive to each screw to prevent them from vibrating loose. Then, insert the 3 allen head screws into the holes on the clip as shown in photo 14.
The screws should not protrude through the bottom of the plate.
Photo 14a
Slide the clip around the lock starting with the bent end at the door jamb. The clip will slide into the slots on the lock that the factory lock clip used. It may be a tight fit, but it should slide on with just a little effort.
If it doesn't slide on somewhat easily, make sure the screws do not go past the bottom surface of the clip and interfere with installation.
Push the clip all the way toward the lock until it seats against the lock.
 14
14
 14a
14a
disc lock rod, put on support plate, put on clip, tighten screws
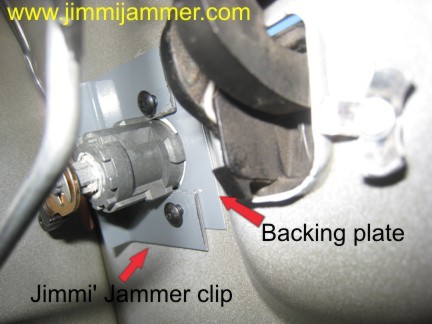
Photo 15
Use a 3/32" allen wrench to snug up the screws. The screws on the legs of the clip should be past the lock and easily accessible with the allen wrench.
Photo 15a shows the Jimmi' Jammer® inside the door, protecting the lock assembly.
 15
15
 15a
15a
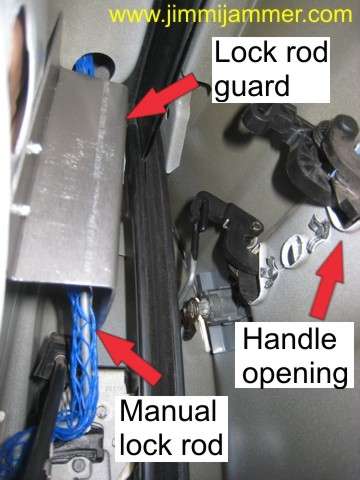
We are now ready to install the Lock Rod Guard plate.
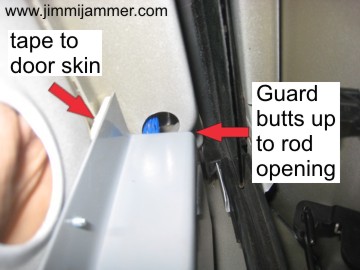
Photo 16
This photo shows a Lock Rod Guard in place inside the door cavity.
The Lock Rod Guard prevents a screwdriver from entering through the handle opening and getting to the manual lock rod.
Along the left edge of photo 16, you can see two screws holding the plate to the door skin. You will need to drill these holes in the door skin, then mark the Lock Rod Guard plate and drill corresponding holes in it. This operation is very easy.
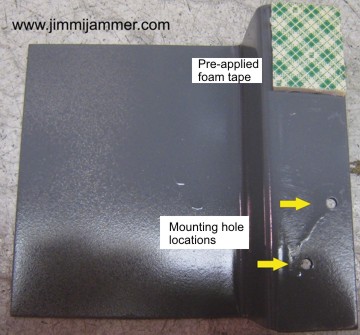
Photo 16a
The Lock Rod Guard plate is furnished with a piece of double sided foam tape in one corner.
This corner of the plate should butt up to the bottom side of the door sheet metal near where the lock rod comes through into the door cavity. This corner of the Lock Rod Guard can be seen in photo 16a.
The tape is just to prevent the plate from rattling while you're driving.
 16
16
 16a
16a
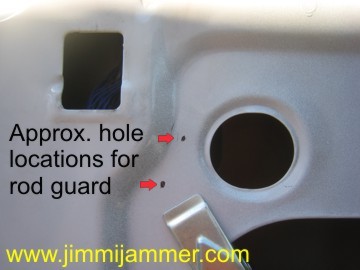
Photo 17
This photo shows the door skin. The Lock Rod Guard plate is inside the door cavity as shown in photos 16 and 16a. The clamp in photo 17 is holding the plate in place.
With the plate in place, feel for the surface of the plate inside the door cavity. You can mark two places where the screws should go, approximately where shown. Make sure your hole locations will hit the plate behind the door skin. Use a punch to mark your hole locations.
Remove the plate from the door. Use a 3/16 " bit to drill your holes.
It may be necessary to smooth the back side of the door skin to remove the burr from drilling.
When holes are drilled, put the plate back in place and mark through the door skin where to drill holes on the plate.
 17
17 Photo 18
After you've marked the holes on the plate, remove the plate from the door.
Use a 3/16" drill and make the holes in the marked locations.
With both holes drilled, check alignment of Lock Rod Guard holes with your newly drilled holes in the door skin.
If everything aligns, peel the backing from the tape on the Lock Rod Guard plate, re-align in door and press tape firmly to door panel metal.
Put in both provided screws and nuts.
Check operation of door lock and that everything is snug.
 18
18 Reverse the order of disassembly to put the door back together.
This completes the installation process. You can now do the other door!
Don't forget to protect your hood compartment or your tailgate!
If you have comments or additions that may be helpful, please contact us through the contact page.

All images and descriptions
©Redline Technical Group, Inc.
1998-current.