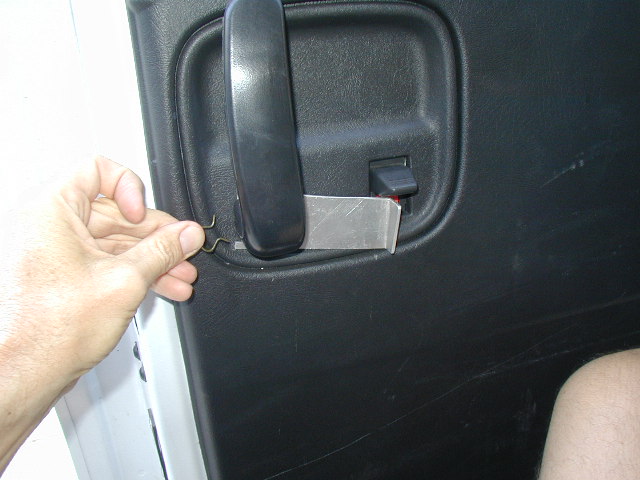
Photo 1
Prop the sliding door open and brace it so it can't roll forward or backward.
Remove the door handle by taking out the C-clip that holds the handle in place. By pushing inward on the door panel, you can see behind the handle to locate the clip.
Work the open end of the clip with a clip removal tool, or use a piece of rag and work it in behind the handle. Work it back and forth while applying pressure against the open end of the clip and it will come off. This takes some practice but will work.
With clip removed, pull handle straight off.
 1
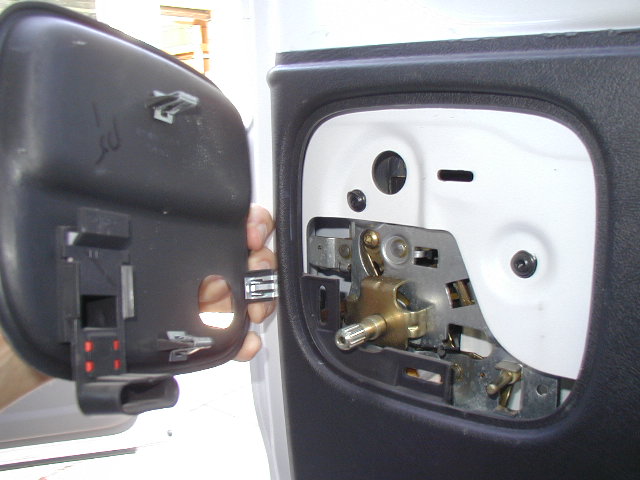
1 Photo 2
Handle shroud can be removed by prying it outward away from the door. The metal clips can be seen about top/center and bottom center. These snap into the body metal and should pull straight out to release.
 2
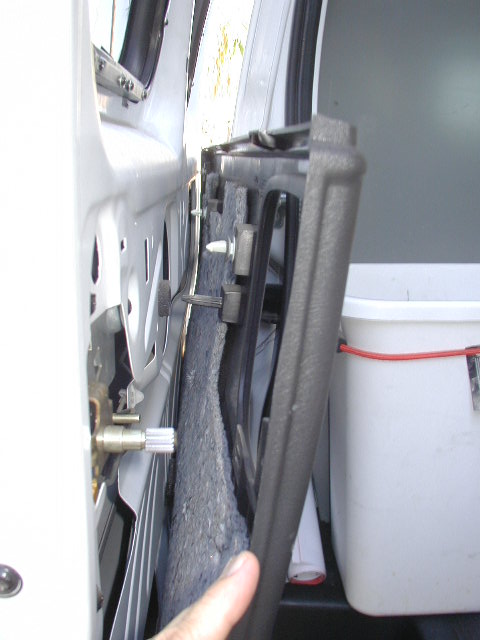
2 Photo 3
Begin prying door panel away from the inner door skin. The panel is held to the door with several plastic clips.
To unsnap the clips, a panel popper tool works best, but a long flat screwdriver can be used to pull them out. A small block of wood under the screwdriver shaft works as a fulcrum to give leverage and pop the clip out.
Work around the door releasing all of the clips. See all the locations in the next photo.
 3
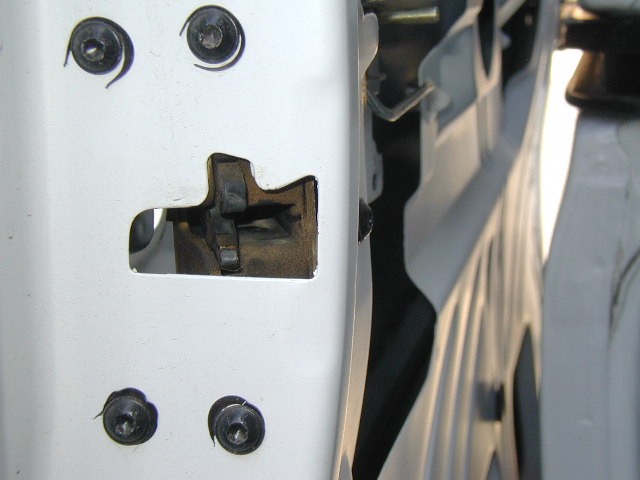
3Photo 4
This photo shows all the snap locations on the back of the door panel.
 4
4 Photo 5
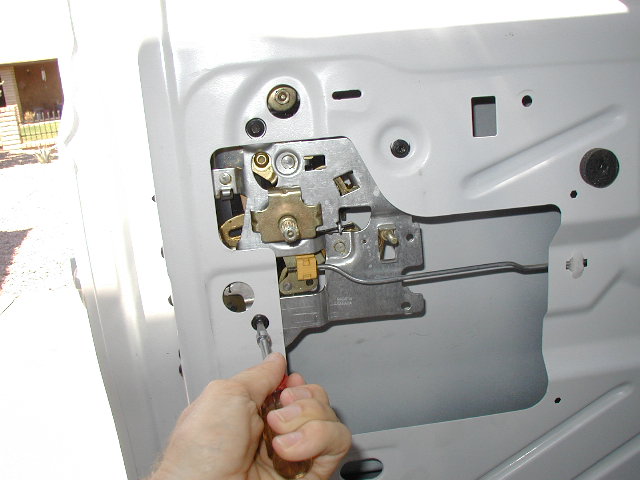
Loosen the 4 torx head screws in the door jamb that hold the latch assembly in place. They will be removed after everything is loose.
 5
5 Photo 6
Loosen the three torx head screws on the door skin that hold the latch to that panel.
 6
6
Photo 7
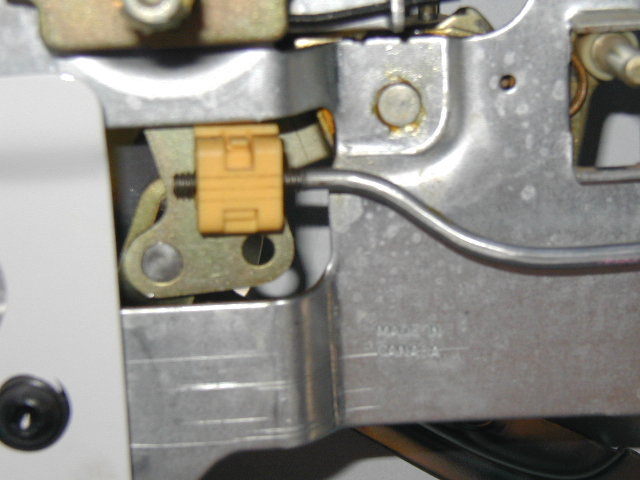
Release the rear latch actuation rod at the yellow clip shown here. This clip opens by releasing a locking tab on the clip. The rod can be removed once the clip is opened.
 7
7 Photo 8
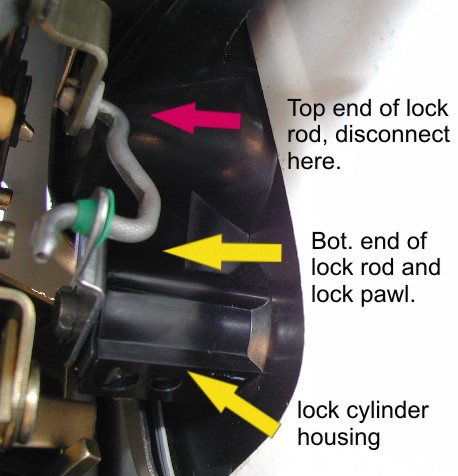
This photo looks up into the door cavity from below the handle and latch assemblies.
The red arrow points to the upper end of the short lock rod. This end can easily be unsnapped from it's holder at the latch assembly. The rod will then hang from the lock pawl. Do not remove the rod from the lock pawl.
 8
8 Photo 9
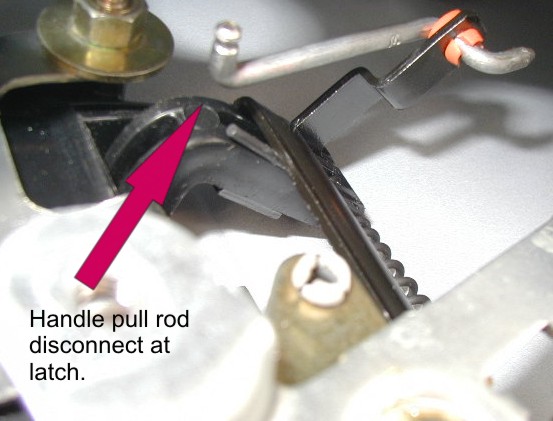
Also taken from below, this photo shows the top end of the handle where the handle pull rod is attached to the handle. The end where the red arrow points was connected to the latch assembly. It can easily be pulled out of it's holder on the latch end.
 9
9 Photo 10
Now the lock rod, handle pull rod and rear latch rods should be loose.
Remove the 4 screws from the door jamb and the 2 front screws from the door skin so the latch assembly can swing down. This will allow more room to work up near the handle.
 10
10 Photo 11
Installation Tip:
The handle studs are threaded into the handle plastic. Therefore, it is common that the stud will try to back out when the nut is loosened. A small vice grip pliers. clamped on the very end of the stud will prevent it from turning while you break the nut loose. If the stud comes loose or out, the door handle can be removed and the stud threaded back into the handle. Do not over tighten, just make it snug. This is not a difficult operation, but will add some time to the process.
Remove the nut from the lower handle stud. The stud can be seen in this photo just to the left of the lock assembly.
Bring the plate marked "Sliding Door" into the door cavity. Place the slot over the door handle stud while positioning the plate lock cutout to surround the lock housing.
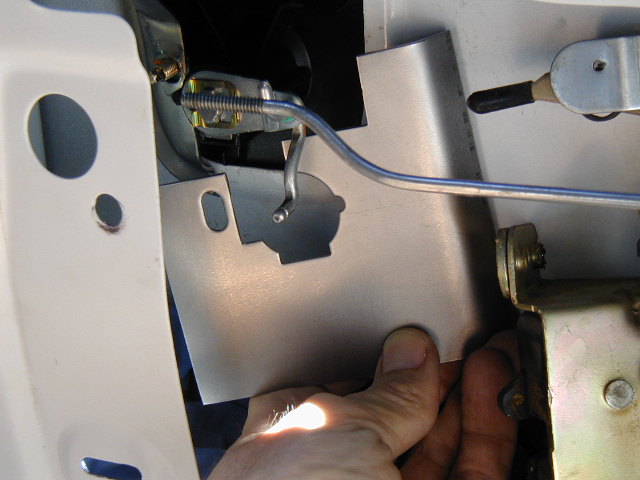 11
11 Photo 12
With the plate now in place, the handle nut may be reinstalled and tightened down. Make sure the stud didn't come loose when the nut was loosened. If so, thread it back into the handle carefully, do not over tighten, just make it snug.
 12
12 Photo 13
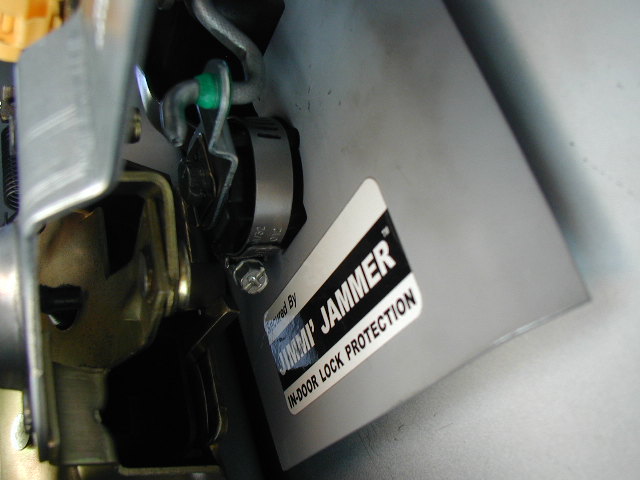
Each kit comes with circular clamps to go around the lock cylinder housing to help prevent thieves from breaking the plastic.
Shown here, the clamp is in place around the lock cylinder housing, pressed up to the plate. This will strengthen the entire handle and lock in this area.
Tighten the clamp snug, but do not over tighten.
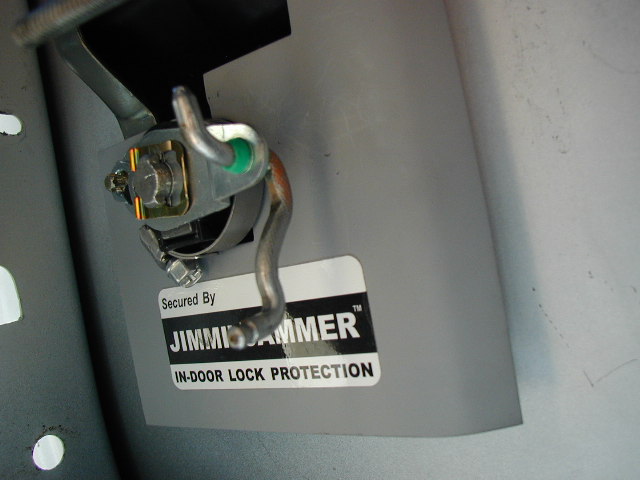 13
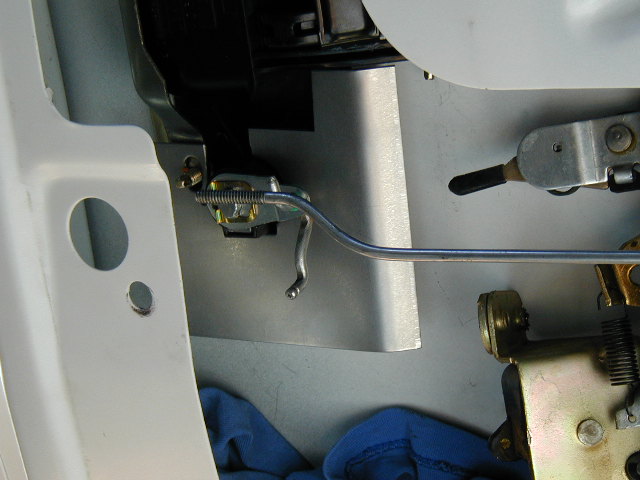
13 Photo 14
Check the operation of the lock, then put the door back together in reverse order.
This photo shows the plate and clamp in place with the rods re-attached to their respective locations.
Put the latch back in place, test everything before buttoning up the door panel.
If you're just reading through this, it may look complex, but it really isn't too bad. Take your time and use the photos and you should be able to do it without much trouble.
 14
14 This completes the installation process. You can now do one of the other doors!
If you have comments or additions that may be helpful, please contact us through the contact page.
To see the tutorial for front doors, click here
To see the tutorial for swing open style side doors, click here.
To see the tutorial for swing open style rear cargo door, click here

All images and descriptions
©Redline Technical Group, Inc.
1998-current