Photo 1
The first photo shows several pieces that will be removed from the door panel:
- Door handle shroud.
- Triangle shaped trim at top inside corner of panel.
- Door lock switch shroud (already removed).
- Electric switch panel.
- Rubber plug in door jamb just above armrest.
Each of these pieces is held onto the panel with snaps. Work carefully to pry the shrouds and trim piece off first.
The milk crate and block come in handy to rest the panel on while disconnecting the courtesy light on the lower left corner of the panel. You can also rest the panel on the crate to avoid disconnecting the wires to the switch module. Just turn the panel 90 degrees clockwise and prop it up on the crate.
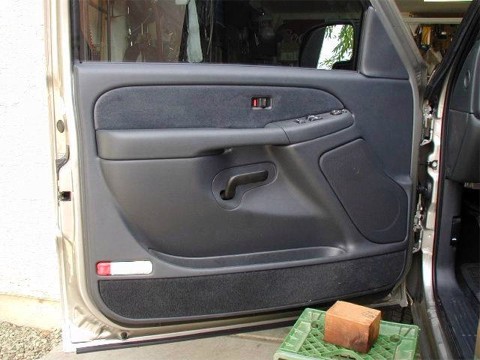
Photo 1
Photo 2
In the second photo, each of the trim pieces has been removed. To remove the electric switch panel, carefully pry the entire assembly upward to release the snaps holding it in place.
It is sometimes easier to remove the panel when the window is down, so make sure it is down but don't disconnect the wires at this time.
Remove two screws holding the panel onto the door. One is under the armrest area, and the other is inside the electric switch cavity.
Carefully lift the panel off the door and rest it on the crate near the door. Don't stress the wires on the switch panel.
Now, roll the window to the up position.
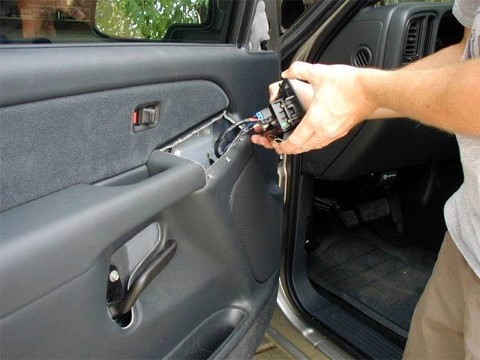
Photo 2
Photos 3a and 3b
Some trucks will have a screw hidden behind the door lock switch. Gently pry the shroud away from the panel and take the switch off. Make note of how the switch mounts with the rod so you can get it back together later.
Remove the screw shown photo 3b. Some trucks may not have a screw here, but check just in case.
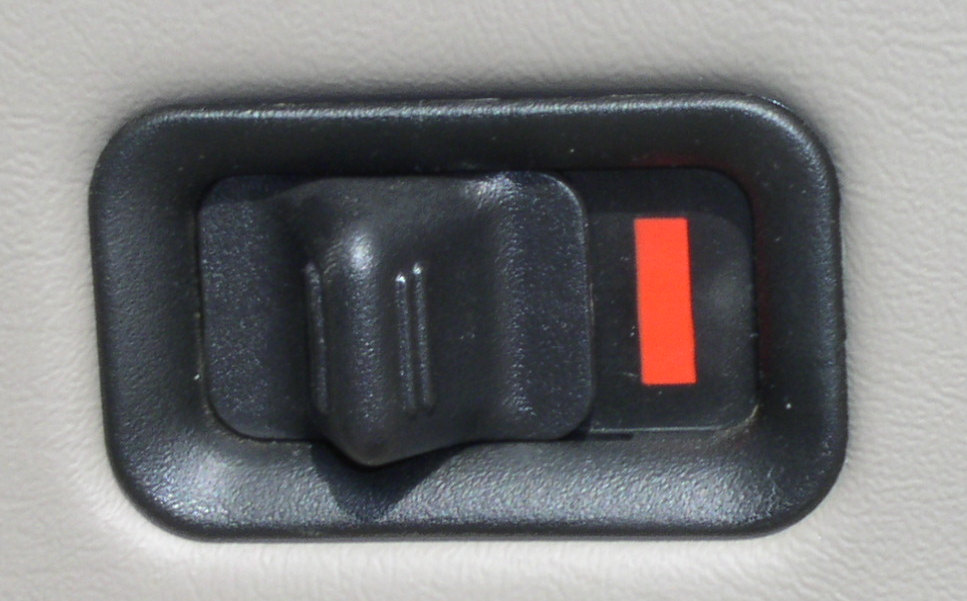 Photo 3a
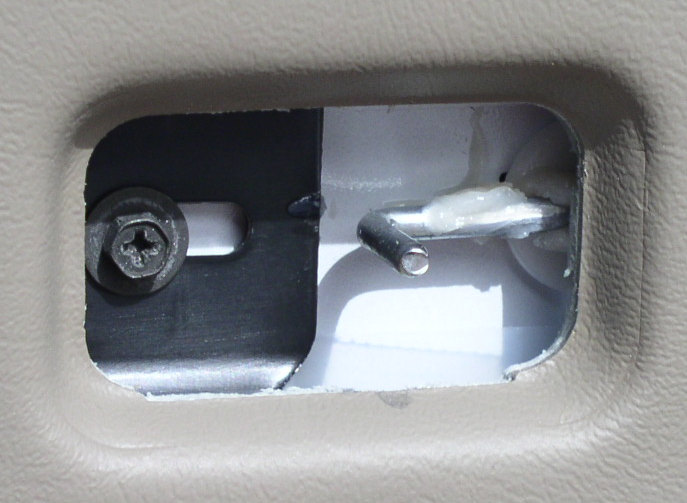 Photo 3b
Photo 4
Photo 4 shows the backside of the panel, with the courtesy lamp removed from it's holder. Once the lamp is out of it's holder, you can rotate the panel onto the crate as described earlier.
If you prefer to remove the panel entirely, the switch module wires will need to be disconnected. Use caution since the connectors have safety snaps on them to prevent accidental disconnection.
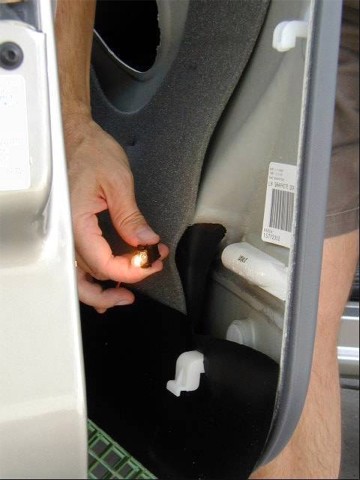 Photo 4
 Photo 5
Once the panel is removed, gently peel back the splash guard far enough to expose the access area. You should now be able to look inside the door and see the backside of the door handle.
Note that the door panel is propped up on the crate and block. This eliminates the need to disconnect the switch wires. Just make sure to anchor the panel so it doesn't fall and stress the wires.
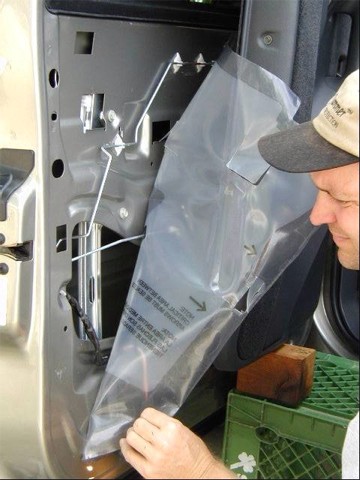 Photo 5
 Photo 6
This photo shows the hole in the door jamb with the rubber plug removed. (Upper left of the photo ). You can see the upper handle nut inside the door.
If you are accustomed to working inside these doors, you can probably complete the installation without removing the handle from the door. If you have big hands, or like to have room to work, it will be easiest to remove the handle from the door.
To remove the handle: (Optional)
1. Disconnect the lock rod at the pawl by snapping the lower part of the plastic rod holder off the rod, then pull the rod back out of the pawl.
2. Disconnect the handle pull rod, either at the top or bottom, whichever is easiest for you to reach.
3. There are 3 nuts holding the handle on the door, remove them.
4. Pull the handle out of the door.
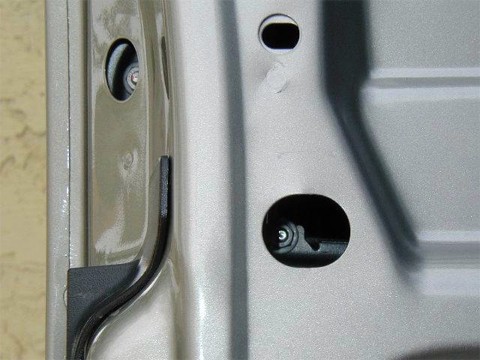
Photo 6
Photo 7
Using the hose clamp supplied with the kit, adjust the clamp to just larger than the lock cylinder holder. Slip the clamp over the lock holder plastic, covering the snap clip that holds the lock in the plastic. (Note: Lock rod has been removed in this photo for clarity.)
If you removed the handle from the door, leave the clamp slightly loose and allow enough room between the bottom edge of the handle and the clamp head to allow getting the handle back in the door. You may have to move things around as you re-install the handle.
Once in the door, tighten up the clamp, keeping the head of the clamp at the bottom of the lock as shown in Photo 7.
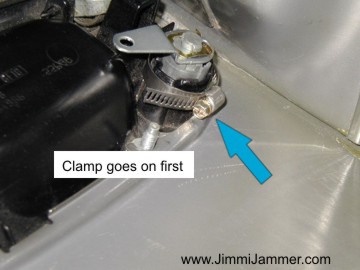 Photo 7
Photo 8
With the handle in the door, place the plate over the two mounting studs as shown in photo 8. You will need to move the lock pawl up or down using the key to get the plate in place. It may help to pull the handle out of the door just a little to allow easier placement of the plate.
This photo shows the passenger side inside the door. Some plate revisions will look a little different, but the idea is the same.
Once in place, replace all three handle nuts, reattach the lock and handle rods and test the operation of everything before re-assembly of door.
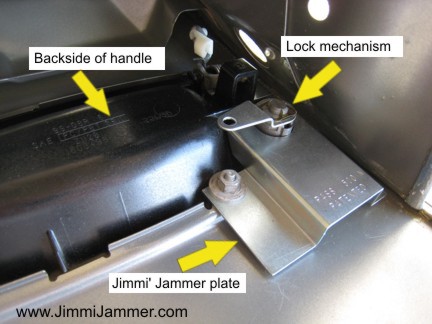 Photo 8
 Very Important:
Test the lock operation before putting the door back together.
If your truck has a lock cylinder only on the drivers door, put a plate in the passenger door anyway. There are other lock rods inside the door besides the lock cylinder that are vulnerable to attack.
Note to installers: Putting the clamp on the handle adds some difficulty to the installation, but is well worth the time in the strength it will add to the assembly.
This completes the installation. You can put the door back together, put the window label in and start the other side.